The pedigree table
The first step is to input the data for the analysis. You will need to upload suitable pedigree file and specify who is affected, who is a carrier, who is the proband or index case, etc. All these tasks are done on the Pedigree table panel within the app.
Uploading a pedigree
shinyseg works with pedigree files in ped format, and you may upload more than one and remove them at any time.
The ped format
A ped file encodes a family in a tabular structure with columns:
id: individual ID.fid: father’s ID, 0 if not included in the pedigree.mid: mother’s ID, 0 if not included in the pedigree.sex: 1 = male; 2 = female.
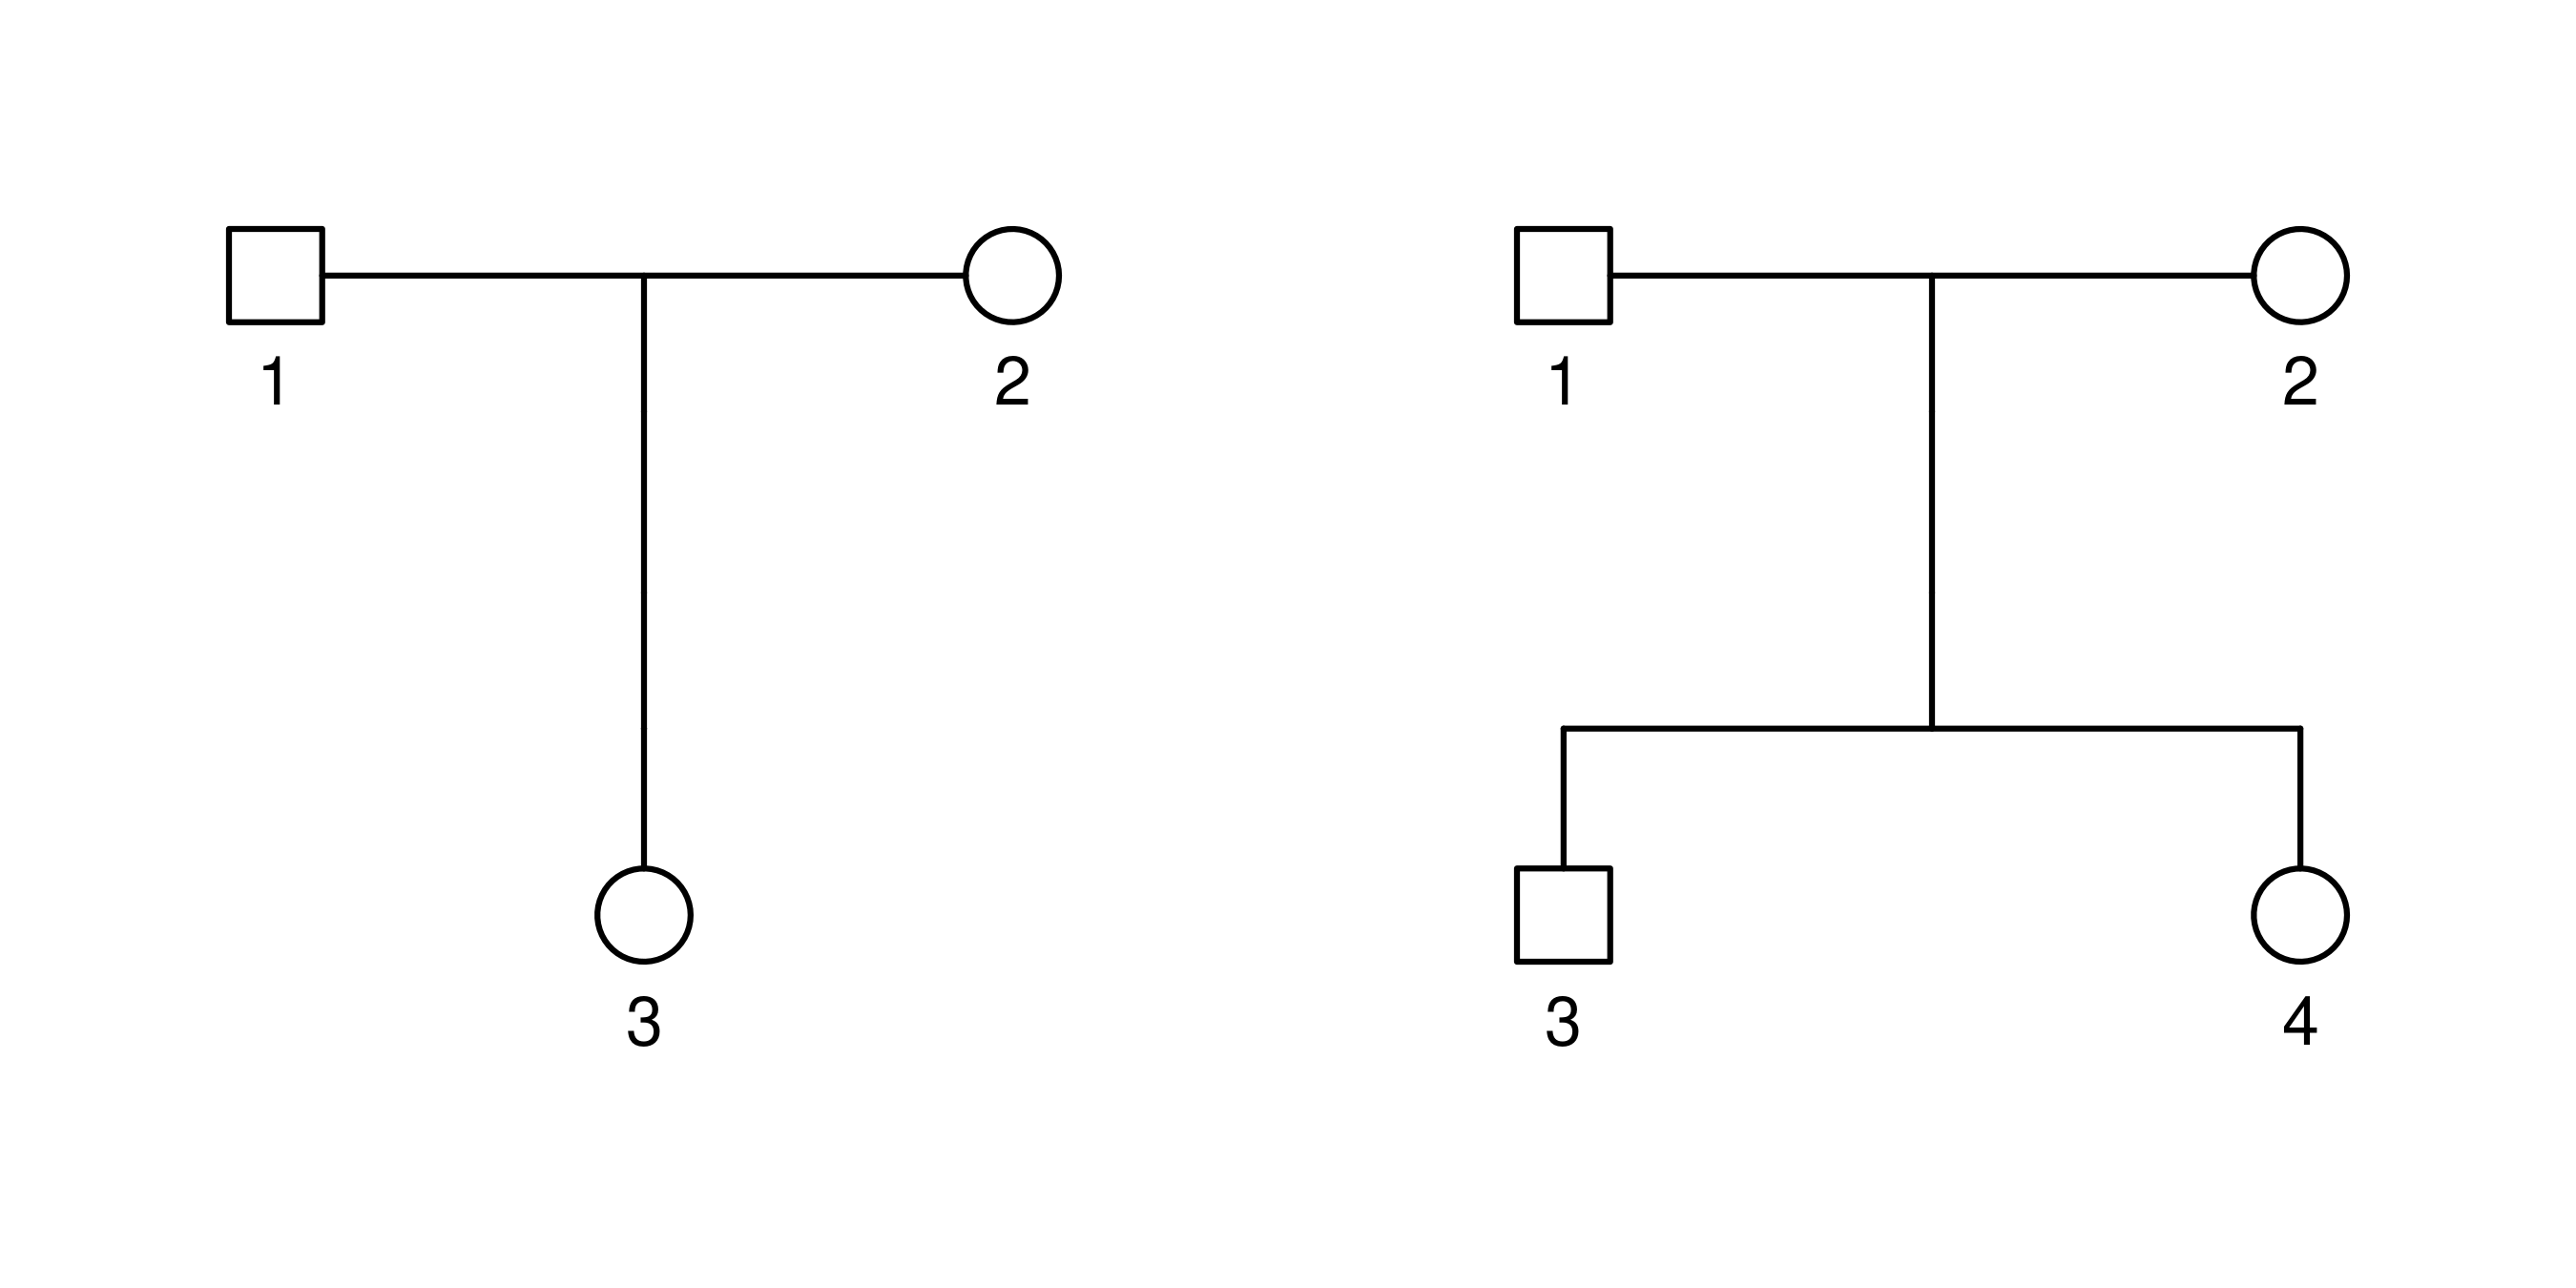
Here is an example of such a file and the corresponding family.
 id fid mid sex
  1   0   0   1
  2   0   0   2
  3   1   2   1
  4   0   0   1
  5   1   2   2
  6   4   5   1
  7   4   5   2
![]()
If you need help creating the ped file, you can use QuickPed, which allows you to do so in an interactive way.
Once ready, upload it by clicking on Add pedfile. Alternatively, the dropdown menu on the left (Add basic pedigree) offers some basic structures that may suit your analysis. If successful, you will see the family data appearing on the pedigree table and also displayed on the Plot panel to the right.
You will not be able to do more until you add at least one family to the analysis!
Multiple families
You can repeat this process to add more families; they will appear
concatenated in the pedigree table indexed by the ped column. However,
it is also possible to upload multiple pedigrees simultaneously if you
provide this column yourself.
 ped id fid mid sex
   1  1   0   0   1
   1  2   0   0   2
   1  3   1   2   2
   2  1   0   0   1
   2  2   0   0   2
   2  3   1   2   1
   2  4   1   2   2
When dealing with multiple families, you can choose which one to display on the Plot panel by using the directional buttons located on its header. If you want to remove the currently displayed family, simply click on Modify > Remove family on the Pedigree table panel.
Filling in the data
To conduct the analysis, additional data about the families must be specified on the pedigree table. This can be done either within the app or simultaneously with the previous step.
Clinical and genetic data
This refers to specifying who is affected and with what condition, who is known to carry the variant, who does not, and other relevant details. This information is summarized in four columns:
- phenotype: a free-text field to specify disease phenotypes
relevant to the analysis, e.g.,
affected,breast cancer, etc. Usenonafffor unaffected individuals; leave empty if unknown. - carrier: use
negfor non-carriers,hetfor heterozygous (or hemizygous) carriers,homfor homozygous carriers. Leave empty if unknown. - proband: a checkbox indicating the proband or index case.
- age: an integer between 1-100 specifying the age of disease onset or censoring/last follow-up.
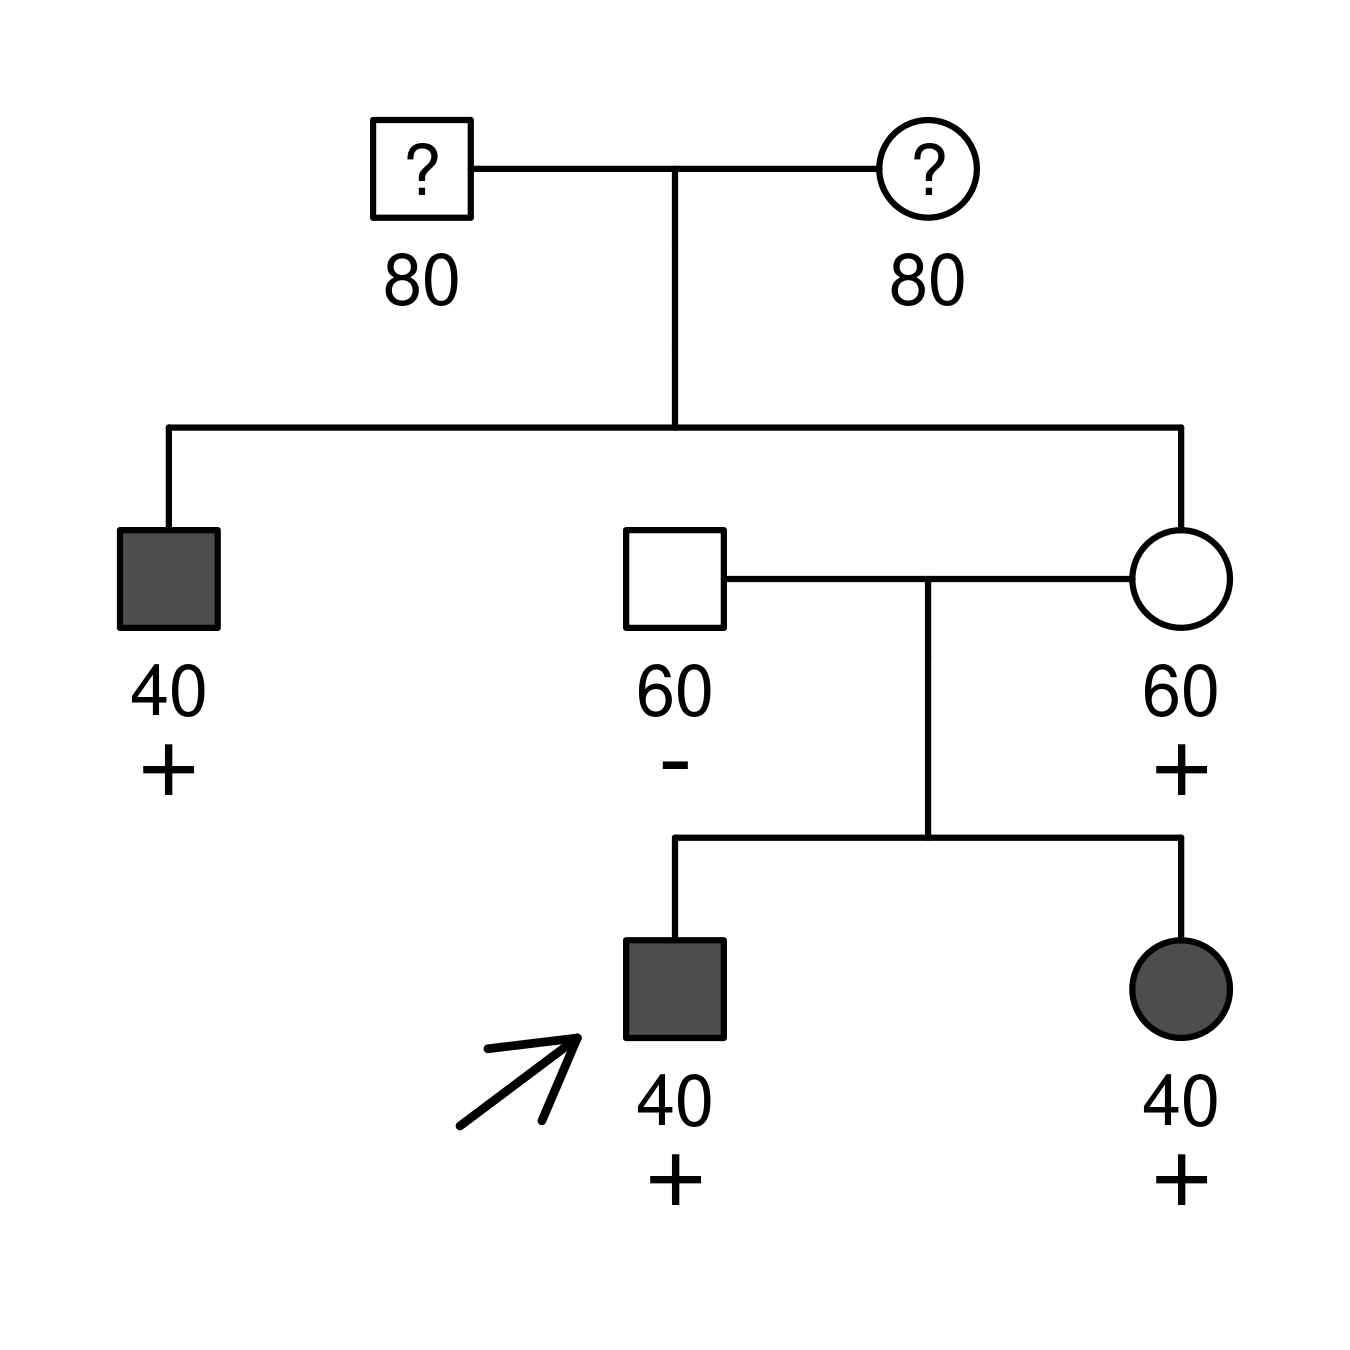
For instance, the following information states that individuals 3, 6, and 7 experienced the onset of a certain disease at 40 years of age. Conversely, individuals 4 and 5 remained unaffected until the age of 60. Individuals 3, 5, 6 (proband), and 7 carry one copy of the variant under study, while individual 4 does not. For the founders 1 and 2, only their ages are known.
 id fid mid sex phenotype carrier proband age
  1   0   0   1         .       .       .  80
  2   0   0   2         .       .       .  80
  3   1   2   1  affected     het       .  40
  4   0   0   1    nonaff     neg       .  60
  5   1   2   2    nonaff     het       .  60
  6   4   5   1  affected     het       1  40
  7   4   5   2  affected     het       .  40
You can find more cases on the Examples section.
For each family, ensure you have:
- 1 or more disease phenotypes.
- 1 or more variant carriers.
- 1 proband, who should be both affected and carrier.
- No missing ages.
Extended ped file
Introducing all this information can be tedious, especially with many family members. However, you can streamline this process by providing some of the additional columns within the pedigree file itself. For example, try copying the previous code block and uploading it via Add pedfile.
This option accepts various input formats, but it can be finicky when reading empty cells. For this reason, we recommend replacing these with dots to ensure smooth processing.
Note that shinyseg will verify the uploaded data and may remove any incorrectly specified information.